
to Ream a Hole: Complete Guide
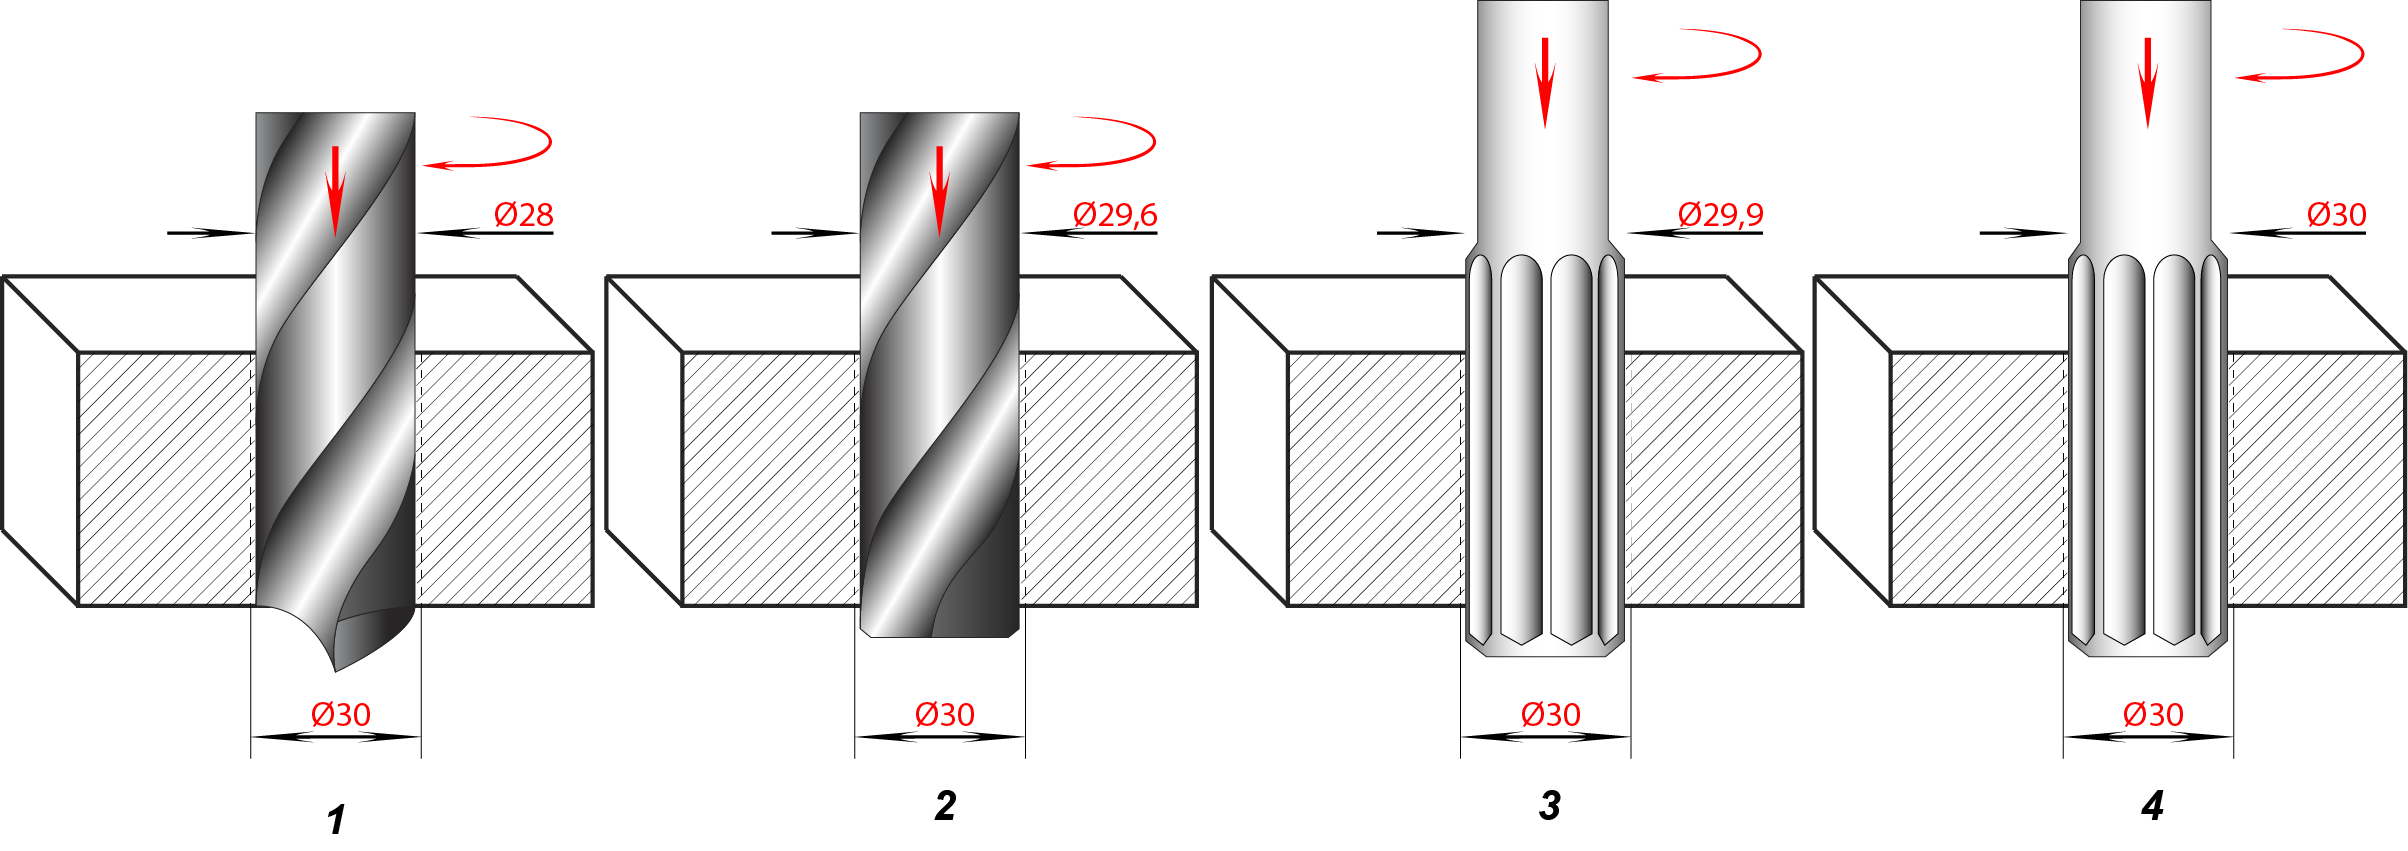
Reaming is always preceded by drilling or counterboring the hole. The drill or counterbore diameter should be selected to leave an appropriate machining allowance: 0.25–0.50 mm (0.010–0.020 in) for rough reaming and 0.05–0.15 mm (0.002–0.006 in) for finish reaming. The depth of cut corresponds to the thickness of the material removed and is equal to one-half of the total diameter allowance.
Feed rate and cutting speed have a significant effect on the surface finish of a reamed hole. The higher the required surface quality, the lower the cutting speed and feed should be. For holes up to 25 mm (1 in) in diameter, a machining allowance of 0.10–0.15 mm (0.004–0.006 in) is recommended for rough reaming and 0.02–0.05 mm (0.001–0.002 in) for finish reaming. Holes of this size should first be rough reamed and then finish reamed. Holes larger than 25 mm should first be counterbored, followed by rough and finish reaming.
The dimensional accuracy and surface finish of a reamed hole depend greatly on the use of proper cutting fluids. Insufficient lubrication may cause the hole to become oversized, reduce dimensional accuracy, increase surface roughness, and raise the risk of tool seizure or reamer breakage.
Example of a Reaming Sequence
Figure 1 illustrates the machining sequence for producing a 30 mm diameter hole in a steel workpiece to Accuracy Grade 2.
- Drill a 28 mm hole.
- Core drilling the hole to 29.6 mm.
- Rough ream to 29.9 mm.
- Finish ream to 30.0 mm.
Recommended Cutting Fluids
The following cutting fluids are recommended for different workpiece materials:
- Steel: Mineral cutting oil.
- Copper: Water-soluble emulsion with added oil.
- Aluminum: A mixture of turpentine and kerosene.
- Duralumin: Rapeseed oil.
Bronze and cast iron should generally be reamed dry, without the use of cutting fluids.
Hand Reaming
Before beginning the operation:
- Check the machining allowance left for reaming. Excessive stock removal accelerates tool wear and may cause chipping of the cutting edges.
- Select a reamer of the correct type and size. Inspect the cutting edges for chips, nicks, burrs, or other damage before use.
- Carefully insert the reamer into the hole and verify that it is perpendicular to the workpiece using a 90° square. Once proper alignment has been confirmed, attach a tap wrench to the square shank of the reamer.
- When reaming holes in hard-to-reach locations, use a suitable extension fitted to the square shank. Attach the tap wrench to the extension.
Machine Reaming
Machine reaming is performed in much the same manner as drilling. The reamer is rigidly mounted in the machine spindle using a chuck or suitable adapter sleeves. In addition to secure clamping, accurate alignment between the spindle axis and the reamer axis is essential to achieve the required dimensional accuracy and surface finish.